Finding the Sweet Spot: Creativity, Candy, and Commerce
Through the design, manufacture, and marketing of their own signature chocolate bars, these middle school students brought curiosity and passion to their STEM learning.
Your content has been saved!
Go to My Saved Content.During the 2013-2014 school year, Elizabeth Forward Middle School created a DREAM Factory by combining art, technology education, and computer science. With this space, we removed the silos of the traditional subject classes -- instead, we've implemented a project-based curriculum, and students rotate between teachers according to their needs to complete a DREAM Factory project. The art, computer science, and technology education teachers have common planning time to work on projects where students can see the cross-curricular connections between these three subjects.
We wanted to do a project that would a) engage the kids, while b) giving them 21st-century skills. Then it hit us: We have the Sarris Candy Company in our own back yard. The three teachers visited Sarris in preparation for the unit to learn the basics of candy making.
The Candy Bar Project
With this project, students in the DREAM Factory learn to be entrepreneurs for two weeks and create a chocolate bar company. This means learning how to design the chocolate bar, creating the mold for it, pouring the chocolate, designing a company logo, creating a business plan, creating company business cards, and finally creating a 30-second commercial marketing the chocolate bar and the company. Students complete this entire process in two and a half weeks of working with the art, computer science, and technology education teachers. The DREAM Factory concept truly breaks down the silos of teaching, letting students see how design, art, and multimedia are connected in the today's world.
Product Design
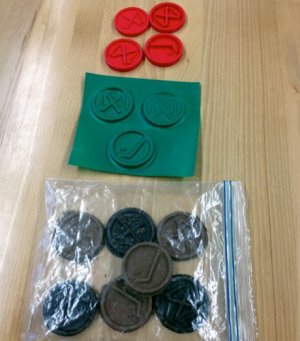
In the technology education class, students create their own 3D candy using the free app Google SketchUp on a laptop. The technology teacher has the students research different types of candy bars, including a range of factors from product shape to lettering or other surface designs. They create prototypes using cardboard, paper, foam, and other materials to help with the design process. Once the students are happy with their prototypes, they use Google SketchUp to design their candy bar in a 3D world, and then print it using a 3D printer. We have several MakerBot Replicator ($2,200) 3D printers, and now we are using PrintrBots ($399). When students are holding their 3D-printed candy bars in their hands, they may decide to redesign them or move ahead with the process.

Creating a Mold and Adding Chocolate
The next step is drilling very small holes in the prototype in preparation to create a mold. The small holes are for a vacuum mold to register detailed impressions. Students then take their 3D print to the vacuum mold to create a mold of their own candy bar. The vacuum mold was purchased for approximately $1,000, but you might be able to find a less expensive one on eBay.
After creating their mold, students go to the family and consumer science teacher to learn about chocolate, how to melt it, and how to pour it into their molds. They also learn about the nutritional facts of the chocolate and create an Excel table of the facts.
Packaging
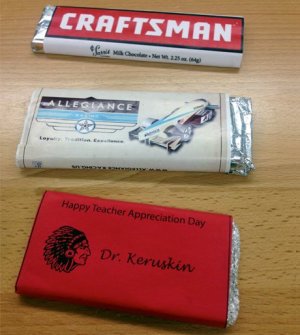
With the art teacher, students learn Adobe Photoshop and then use it to create the logo for their chocolate company. Once they're satisfied with their logo, they begin designing the wrappers for their candy bars, which include the logos and nutritional facts. This phase of the design process includes learning how to fold the wrappers and how the fold lines contribute to the spacing of the logo and nutritional facts. In the final stage of manufacturing, students wrap their candy bars in the family consumer science room.

Marketing
Now it's time to bring these delicious products to market by creating a 30-second commercial. The computer science teacher introduces students to iMovie, and to green-screen technology using the Veescope app. They develop their storyboards with Microsoft Word, and the teacher must approve these before they can continue. Once students are ready to proceed, they begin using their media tools to create their commercial. The final step is a business plan that details the costs of making these candy bars, the cost of selling them, and the price points and possible revenues. Students will also create a business card using their candy bar logo.
We've found that it's possible to engage students in STEM learning when they're exploring something they truly care about -- and what middle school kid doesn't care about candy? What projects have you used for engaging your students in STEM learning? Please share in the comments below.
