The Optimal Seating Plan? Letting Your Students Choose
Allowing students to move the furniture can help you differentiate instruction and give your students more agency in their learning.
Your content has been saved!
Go to My Saved Content.How you arrange your seating can be an asset for differentiating instruction. Summit Preparatory Charter High School in Redwood City, California, uses different seating configurations for independent work, collaborative work, mini lessons, and large-group discussions.
Through scaffolded guidance from their teachers—which includes a personalized learning platform, daily goals, and a culture of formative assessment—students understand how they learn best and what resources they need, enabling them to choose and set up the seating arrangement that works best for them each day.
Summit uses furniture with wheels—trapezoidal and rectangular tables and soft fabric lounge chairs with tablet arms—to make it easy for students to move the furniture. Used furniture networks, like The Reuse Network, can be great resources, says Myron Kong, a Summit real estate team member, who adds that another way to lower costs when purchasing furniture is to aggregate all school orders into one.
Here’s how Summit creates a flexible learning environment to support differentiated instruction.
Understand Your Students’ Needs
Before you can plan your physical space, you need to know the needs of your students, and surveys can you help you figure those out. Try questions like “Do you want to work independently or with a group?” and “Do you want to learn from a Socratic discussion or a video?”
To learn more about creating surveys—and to learn about other free tools Summit uses to differentiate student learning—see “Challenging Every Student in the Room.”
Summit Preparatory Charter High School
Enrollment
388 | Charter, SuburbanPer Pupil Expenditures
$8917 School • $9658 DistrictFree / Reduced Lunch
47%DEMOGRAPHICS:
Plan Your Physical Space
Design different seating configurations students can choose from when they come in. Chris Kelly, a history teacher, suggests asking yourself about the best spaces for independent and collaborative work, and how many students will want mini lessons.
“Have a clear, data-driven objective for why you want students to rearrange the space in the classroom. It is easier to articulate, get buy-in, and have students appreciate the personalized ways that you are helping them to learn,” explains Cady Ching, a biology and AP environmental science teacher.
Post-it Note Goals

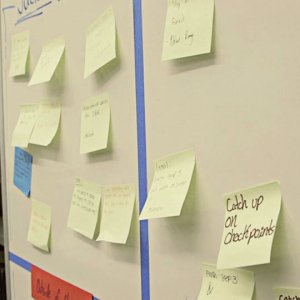
Before breaking out into the different seating options, Kelly’s students write their goals for the day on Post-it notes and stick them on the whiteboard. They write down what they want to accomplish for the day, noting specific tasks or what they hope to achieve by working alone, with a group, or in a mini lesson. The goals can be things like helping their fellow students after they finish a chapter or unit, understanding specific skills, or reaching certain checkpoints.
This increases transparency and allows Kelly to better help his students. It also enables students to make the best choices for their own learning, choosing their seating arrangement and their collaboration partners.
Independent Work
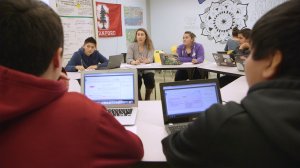
Have your students move tables against the walls. Their backs will face you, increasing transparency. “If they’re working with their computers [or other materials], I can see specifically what they’re working on at a given moment,” says Kelly. This transparency enables you to check in on your students, offering encouragement or guidance when needed. This table configuration also limits distraction, moving students away from others’ discussions.
Collaborative Work
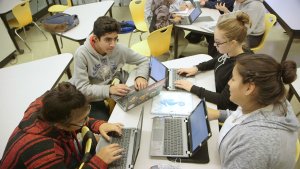
Have your students move tables to the sides of the classroom and work in groups of two to four students per table. With one group per table, your students will be able to make direct eye contact with each other and share their screens or resources with each other, says Kelly. For larger groups of up to six students, push two tables together. Make sure there’s enough space for you to walk around each table so you’re able to check in with every student.

Mini Lessons
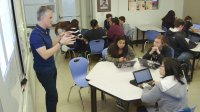
When doing mini lessons for small groups of two to three students, have them move a table to the middle of the room. “For a larger mini lesson, place students at the center in collaborative seating, preventing a ‘teacher-at-the-front-talking’ mode. Facilitate think/pair/shares during the lesson,” suggests Kelly. When doing mini lessons for larger groups, resources such as overhead displays can be a factor in determining the placement of groupings. Media carts with a projector and speaker can create more flexibility, or a projector can be ceiling-tracked to save floor space.
Large-Group Discussions
For group discussions, like Socratic seminars or fishbowl discussions, group students in the middle of the classroom. “They sit in a circle, facing each other, usually with no tables so that open body language is encouraged. It gives them an opportunity to both show knowledge they researched in preparation for the Socratic seminar and to have the quiet space for discussion,” says Ching. Aukeem Ballard, a Habits, Community, and Culture teacher, uses this same table-less circle configuration for whole-class discussions. In fishbowl discussions, 15 students sit in a circle at the center of the room and discuss a topic, and the other 15 sit outside the inner circle, listening and taking notes on the discussion.

“No matter what the physical space might be, it’s the students making decisions to learn that marks a culture of learning,” says Kelly. “It matters more on who is in that space and the kinds of decisions that educators make to set students up to make positive choices for their learning.”
