A Makerspace Built by Elementary Students
Third graders designed a makerspace for their school. Then they got their budget approved and built it.
Your content has been saved!
Go to My Saved Content.When Ocean City Primary School, where I work, asked a group of 8-year-olds to create something, the students were given one design requirement: Whatever they created had to better the school community and solve a problem. This allowed students to be creative and explore their interests in addressing a real-world issue. Students realized that they had an authentic opportunity to make a difference in their school.
Six Steps to an Engaging Makerspace
1. Guide and facilitate: Initially, the students generated typical 8-year-old responses, like, “A robot that does your homework for you!” It’s important to recognize these ideas and support them, but challenge students to critique their concepts. In the case of the robot, the students eventually agreed that it wouldn’t benefit the whole community.
Another interesting idea was a pizza-slice vending machine. After some discussion, students determined that didn’t solve a problem because the school already had a cafeteria that served pizza. So they began talking about things the school didn’t have.
2. When a great idea surfaces, run with it: When a student suggested building a makerspace, his peers wondered what that was and began researching the idea. They shouted out findings: “They have tools! You can build things in them!” The enthusiasm was contagious, and that’s when the teacher knew the project was on the right path. The students were self-motivated, eager, and excited.
3. Incorporate curriculum: Once a project idea is established, the next step is to infuse curriculum into it. The teacher must ask, “What can I teach my students within the topic they have chosen?”
In order to build a makerspace in their school, the Ocean City students would need to have the idea approved by the school board—they’d need to write a proposal. The teacher incorporated a lesson on prewriting strategies and how to organize a proposal.
The proposal needed to include a budget with an organized spreadsheet. A lesson on financial budgets and digital spreadsheets was added.
Students would need to find room for the makerspace, design it, and create blueprints to build it. Measurement and the stages of the design process were explored. And they’d need to present their plans to the building and grounds personnel, as well as the school board, indicating a need for public speaking lessons.
Learning opportunities exist within any project, and teachers can intertwine lessons into the project’s procedure.
4. Guide students to overcome challenges: The students had to submit a budget to request funds that would be donated by the Ocean City Board of Education and Sea Isle Board of Education, Ocean City’s partner district.
Originally, students wanted to create a conventional primary level makerspace filled with craft materials and a 3D printer. They quickly realized that the materials would need to be replenished continually year after year. Cotton balls, popsicle sticks, glue, rubber bands, and 3D printing filament require annual funding.
Keeping an inventory of these items would eventually break the bank, so the kids developed an idea to purchase building materials that could be used over and over again. One of the student’s faces lit up as she enthusiastically shouted, “Legos!” The crowd erupted, “Yeah! A Lego makerspace!”
Obstacles within a design project are opportunities for students to develop problem solving skills and strategies. The process of overcoming challenges teaches them to be resilient and dedicated to the overall goal of completing a task.

5. Plan and present: With the concept in place, the students began planning the Lego makerspace, which they would later dub the Lego-Space. They identified an unused utility room in the school’s library and mapped out blueprints that included a research station, a dry-erase brainstorming window and table, and Lego storage bins. These and other supplies cost a combined $2,000.
We found a company called Play Platoon that makes building bricks that are compatible with Legos, and were able to purchase 65,000 bricks of various sizes and colors for $1,700.
As they shopped around for affordable furniture, one of the students happened upon a giant Lego-like block called an Everblock that can be used to build large structures. These bricks cost approximately $6 each and work just like Legos. We eventually purchased 1,000 Everblocks and used them to build desks, the table, chairs, and the walls within the makerspace.
As thrilling as it was to find the Everblocks, even more exciting was the fact that the third-grade students would be the ones building the components for the space.
With a proposal, blueprints, and a budget of roughly $10,000 in place, the students took their project to the school board and presented it to an audience of nearly 100 community members, and the plans were approved.
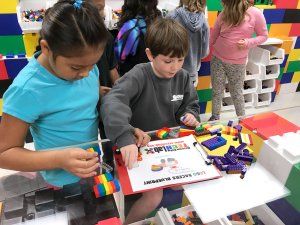
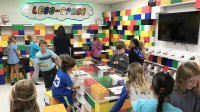
6. Build: Just before the 2017–18 school year, students gathered outside the utility room. Piles of Everblocks had been laid out and organized by color. The students broke into teams and began assembling the building bricks into what would become the Lego-Space.
Six hours later, the room was ready. The accomplished 8-year-olds couldn’t believe what they had created. The achievement planted a seed of success within each of the kids. They took a creative opportunity to better the school and transformed it into something tangible and useful.
Impact on the School Community
The Lego-Space is being used by a wide range of students, teachers, and staff. We incorporated Dash Robots made by Wonder Workshop that have building brick attachments—we already had these robots before creating the makerspace—so the kids can design and build robot accessories out of bricks. STEAM classes are designing and engineering Lego race cars to teach the design process; classroom teachers are planning to incorporate Legos into their subject curriculum; guidance counselors use the room as a behavior modification tool; and after-school clubs use it for design projects.
The impact the students have had within the school is real. They identified a need for a makerspace and took the steps to make it a reality. The countless lessons learned throughout the process and the life experiences the students gained are certain be ones the kids will never forget.
