4 Ways to Use Technology to Make Student Thinking Visible in the Elementary Grades
Simple video and audio recording tools allow students to capture, share, and reflect on their learning.
Your content has been saved!
Go to My Saved Content.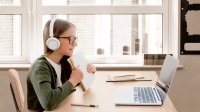
Some of the best evidence of student learning can disappear almost as quickly as it happens. A student explains a tricky concept, talks through an idea, or realizes where their thinking went wrong—and then the moment is gone. Educational technology, however, can give students a simple way to capture that thinking.
A quick audio recording, photo sequence, or digital exhibit can help students explain, create, document, and reflect on their learning, while giving teachers something they can return to.
USING TECHNOLOGY TO MAKE STUDENT THINKING VISIBLE
In my classroom, I helped students make their thinking visible by using audio and video recording technology in the following four ways.
1. Let students teach someone else. One of my favorite ways to see what students really understood was to have them teach it to someone else. In my Montessori upper elementary classroom, older students regularly taught younger students, giving them an authentic reason to organize their thinking, communicate clearly, and take responsibility for their learning. If a student could teach a concept to someone else, I had a pretty good indication that they understood it.
Educational technology can give students an audience for their teaching, even when that audience is simply a recording.
After learning something new, I would have students make a short audio or video recording explaining the concept as if they were teaching it to a younger student. The “student” can be imaginary, or you can give students a specific audience and prompt: Imagine you’re teaching a grade-two student how multiplication works.
Students might explain why the seasons change, demonstrate a multiplication strategy, explain the main idea of a story, or describe the results of a science experiment. They can use hands-on materials, drawings, models, or examples as they teach.
The recording doesn’t need to be polished. I would give students a few minutes to organize their thoughts, then let them explain the concept in their own words. After students completed their recording, I would watch and look for evidence of understanding in their explanations.
2. Give students a way to hear their own growth. At the beginning of a new unit, I would ask students a big question and have them record a quick audio or video response explaining what they currently thought. I would remind them that I didn’t expect them to have the “right” answers yet, since we hadn’t actually learned the new information; I just wanted them to give me their initial ideas so we could see how those ideas changed over time.
For example, before a unit on the water cycle, students might respond to this: Where does rain come from, and where does it go afterward? A student could draw a quick diagram and explain it, talk through their thinking, or simply record a response on a tablet.
At the end of the unit, I would have students record a second response to the same question before listening to their first recording. Then, I would give students time to listen to both responses and make comparisons: What do they understand now that they didn’t understand before? What would they add or change? Where were they on the right track? Students can then record a quick reflection about the differences they notice.
A hesitant explanation may have become more precise, a misconception may have disappeared, or an idea that once seemed confusing may now sound obvious. For teachers, the recordings provide evidence not only of what students learned, but of how their understanding changed over time.
3. Turn students into museum curators. One of my favorite ways to leverage recording technology to make student learning visible was through an activity in which I let students act as museum curators. After a unit, I would have each student choose an object or artifact connected to what they had learned and then ask them to create some kind of representation of the artifact and record a video guide introducing the artifact and its relevance to the unit.
The guide might include a brief overview of the object, what it represents, why it matters, and something the student finds interesting or surprising.
After a unit on habitats, for example, my students created habitat dioramas and recorded themselves explaining the flora and fauna found there, along with where in the world that habitat could be found. Through their video guides, students step into the role of expert as they explain their chosen artifact to others.
4. Make mistakes worth recording. Instead of asking students to erase an incorrect answer and start over, I would choose a few opportunities during a unit to have them pause and capture what happened. Students would photograph their work and make a quick audio recording explaining the following: Here’s what I thought. Here’s where I went wrong. Here’s what I understand now.
For example, a student who incorrectly solves a multiplication problem might photograph the original work, then explain which step caused the problem and how they would approach it differently. In science, a student might record a prediction that didn’t match the results of an experiment and explain what the results taught them.
This gives students a reason to look more closely at their own thinking rather than simply replacing the wrong answer with the right one. Students can look back at an earlier mistake and see not just that they got something wrong, but how they figured it out. It also gives teachers a glimpse into how a student arrived at an answer and what changed in their thinking.
Recording student thinking using technology is a simple yet powerful way to help make student thinking visible. Each of these four methods can be done with recording technology on a computer or a tablet, making it easy to implement these activities with the tools your students are already using.
By creating these kinds of recordings, students get the opportunity to demonstrate their learning and reflect on how that learning changes over time. Plus, teachers can use these recordings to better understand what students are thinking and provide support where needed.