
How to Really Prepare Students for State Tests
A high school teacher uses her state’s testing blueprint to give students practice with the standards and question types they’ll encounter most frequently.
Your content has been saved!
Go to My Saved Content.By March, my classroom used to feel heavy. Not chaotic, not defiant—just tired.
Like many teachers, I responded to testing season by trying to fit more in: More review. More practice. More reassurance that we had covered what mattered. My students complied, but the energy told a different story. They weren’t confused—they were overwhelmed, and so was I.
That’s when I stopped asking “How do I review everything?” and started asking a better question: “What does the test actually prioritize?”
What the Test Blueprint Made Clear
I teach in Virginia, and my students take the state’s Standards of Learning (SOL) assessments at the end of the year. I found information on the test structure by locating the SOL testing blueprint. I didn’t just skim the list of standards—I studied it for patterns. The SOL blueprint explicitly lists the standards assessed and shows how often they appear. Some standards appeared far more frequently than others, and some did not show up at all.
Seeing those percentages mattered because it made clear that the assessment is not evenly weighted across all standards, and this is the case for most state tests. Two things stood out immediately: Informational text carries more weight than literary text. And many of the most frequently assessed standards ask students to analyze, compare, revise, or justify their thinking rather than simply identify a correct answer.
Those realizations changed how I planned. If certain standards dominate the assessment, then treating all standards as equal during test prep wouldn’t actually help students. It would just create noise. Instead of reviewing everything, I realized, I could use the blueprints to narrow my instruction to a small set of high-leverage thinking types, and I could give students short, playful opportunities to practice them without the pressure of a test.
Research supports this approach. A recent study on cognitive load and instructional design shows that learning improves when educators intentionally manage working memory demands and engage students in active, meaningful tasks rather than simply increasing the volume of practice.
Start With the Blueprint, Not a Packet
Testing blueprints are often treated like technical documents meant for specialists, but in reality, they are one of the most teacher-friendly tools we have. When I sat down with the SOL blueprint, I saw that it could give me direction.
I deliberately used the blueprint to identify
- which standards appeared most frequently,
- what kinds of thinking those standards required, and
- which question formats students would see again and again.
That information became my planning guide.
From February through testing season in May, I now plan weekly station rotation tables based on the most heavily tested standards. I identify which standards need the most repeated exposure and intentionally pair each one with every major question type students will encounter on the assessment.
Before we begin, I make one expectation clear to students: As long as every member shows their thinking, the group will receive full credit regardless of whether their answer is right or wrong.
Setting the Conditions for Real Thinking
To make that expectation visible, each table has paper for recording group thinking, and every student is required to write. Students cannot copy a peer’s response and add their name—each person has to explain their own reasoning.
The focus is not on speed or correctness but on their thinking.
That structure establishes a positive dynamic immediately. Students slow down. They listen. They explain. And because full credit is guaranteed if they document their thinking, they are willing to take risks and be honest about what they don’t yet understand.
What You Need to Run These Stations
Before describing the stations, it’s important to say what this isn’t. This isn’t a packet. It isn’t a slide show. And it isn’t tech-heavy.
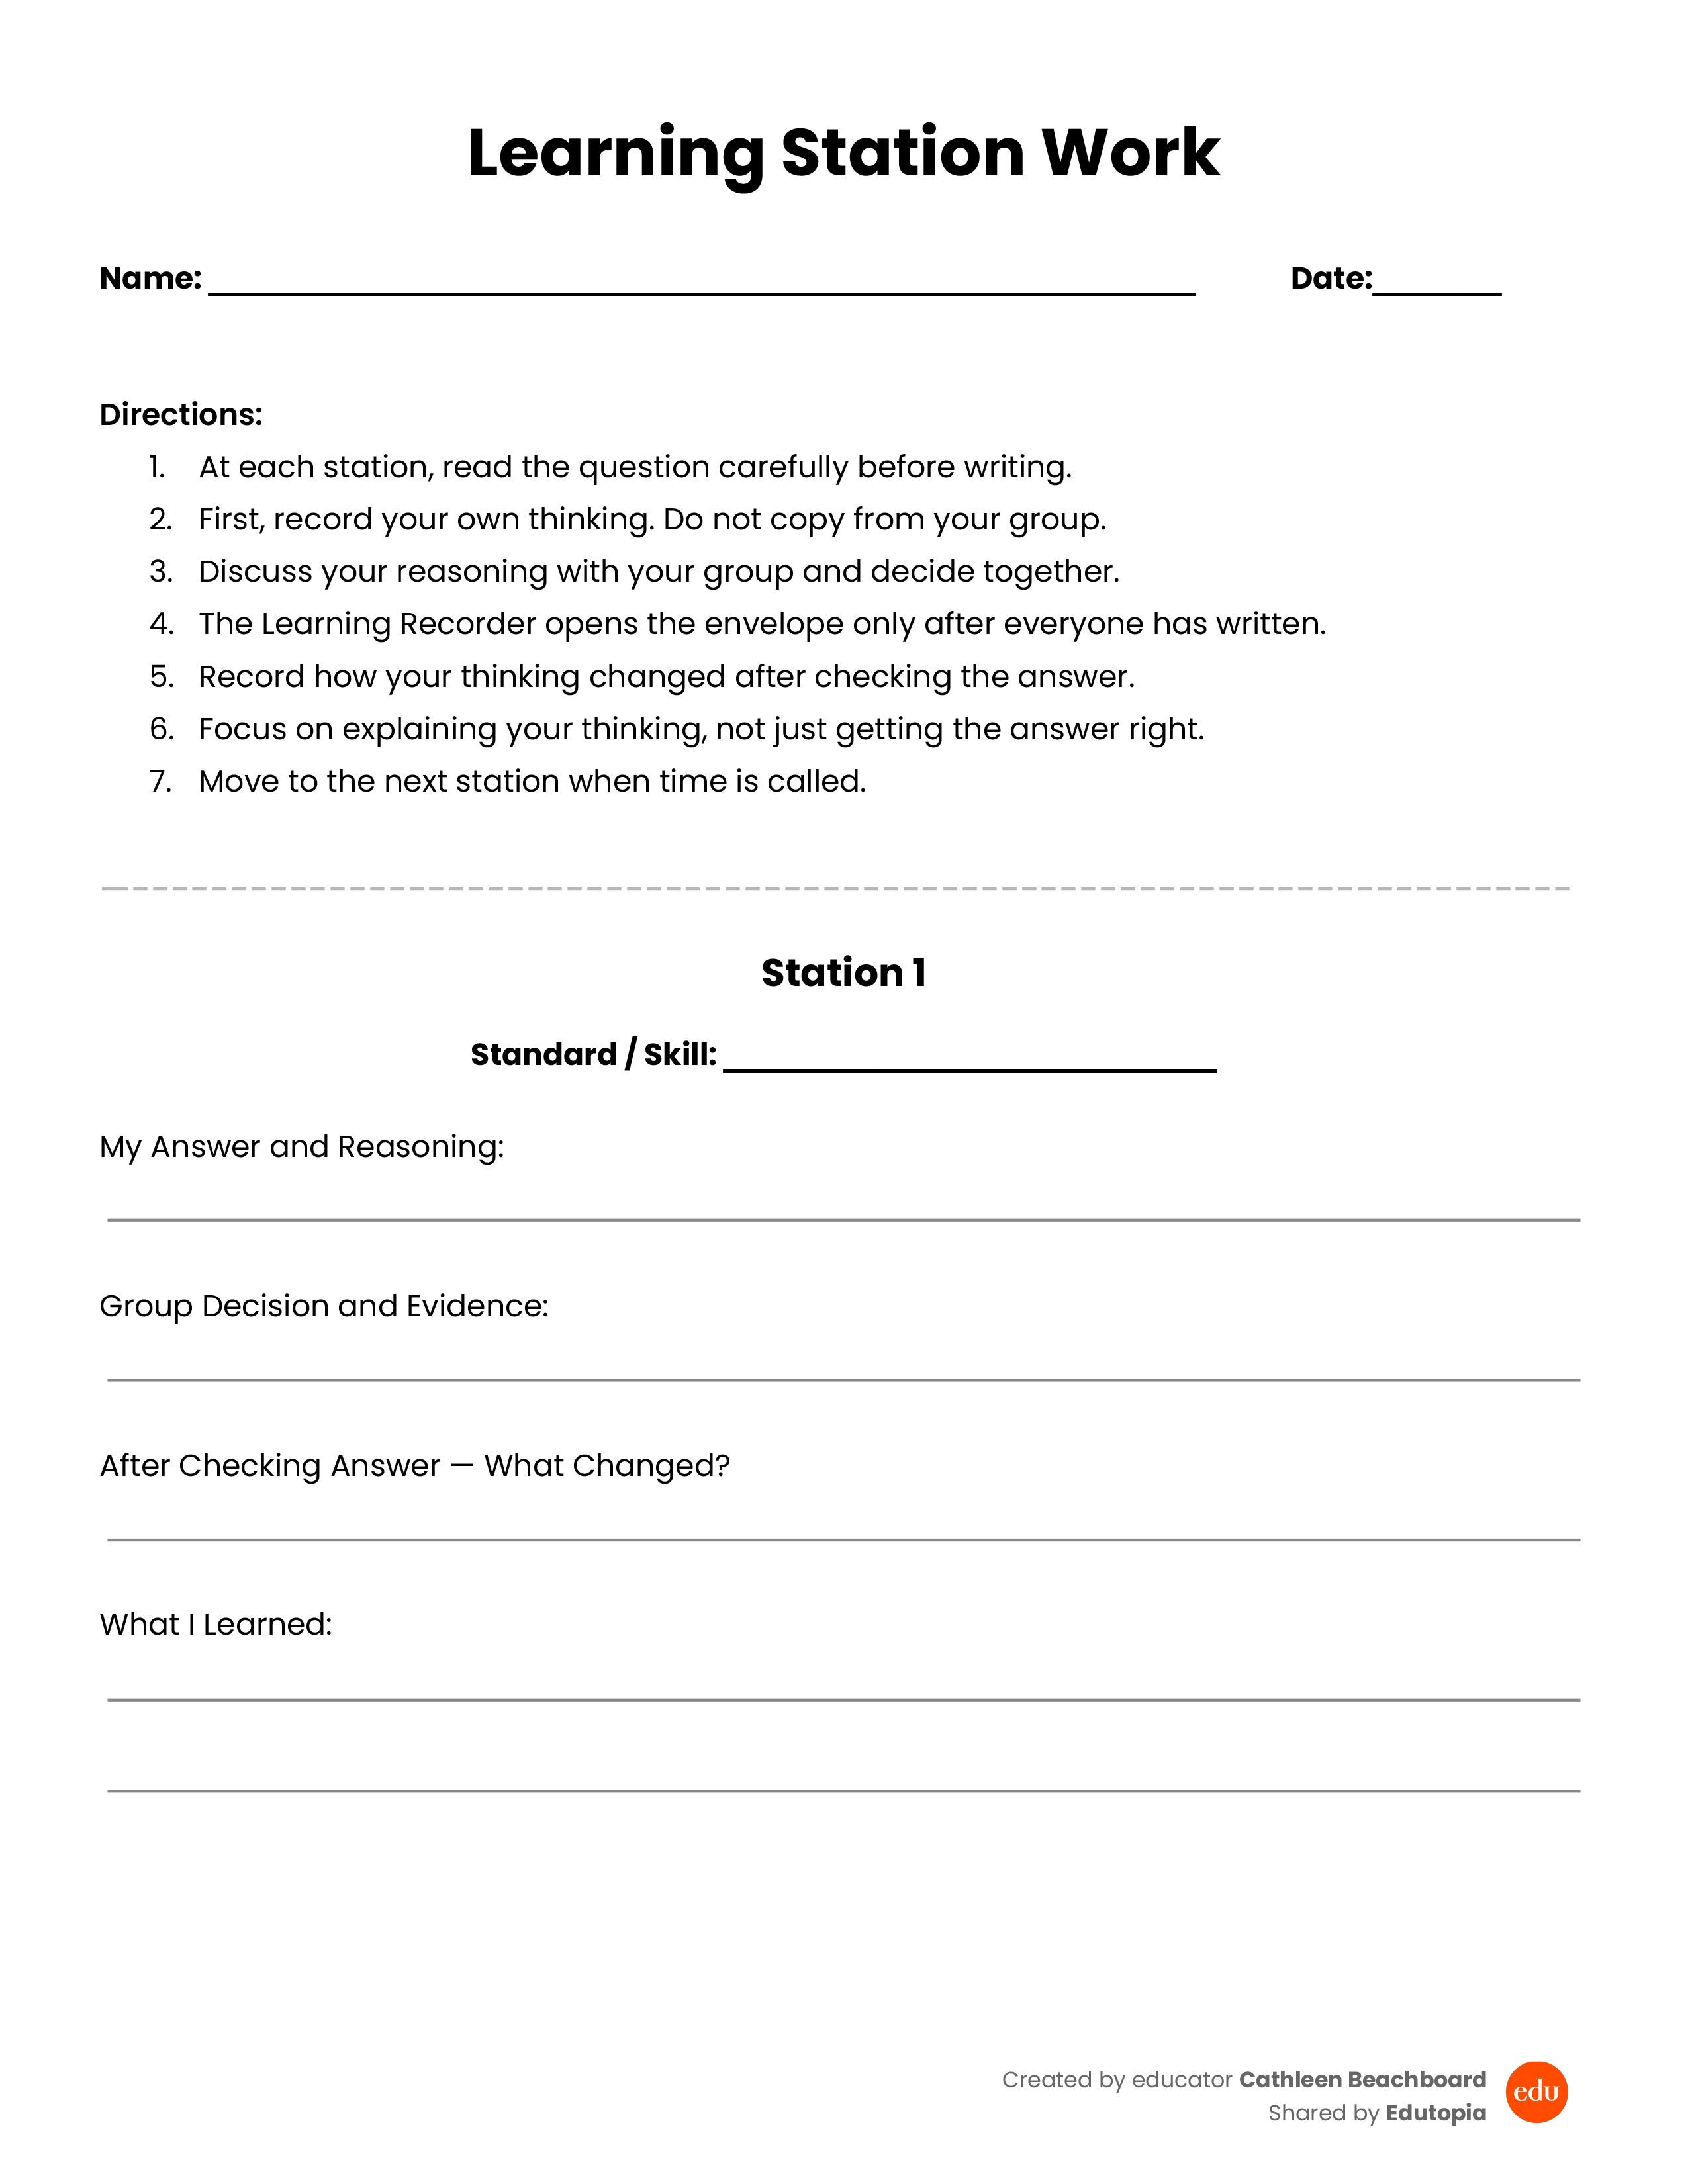
My review station materials include erasable markers for multiple-choice and circling hot-spot questions, Post-it Notes for creating drag-and-drop and matching questions, a sheet for students to record their thinking, and one envelope with an answer key per station.
I write questions directly on the desks with markers or on Post-its. The answer key for each task is in an envelope, and students can’t open it until they’ve discussed the question and recorded their thinking.
That’s it.
The desks are the workspace, the Post-its are manipulatives, and the envelopes slow students down just enough to protect the thinking process.
The 5 Most Common Question Types and How Each Becomes a Station
Once you see how simple the setup is, the station design isn’t intimidating.
Here’s an example, though of course you’ll set up your stations differently, depending on your state’s blueprint. After identifying the most tested standards for the first time, I look closely at the most common question types, pull examples of those questions, and re-create the thinking behind them as desk-based, collaborative stations.
1. Multiple Choice (A, B, C, D). Defend the best answer: I write four answer choices directly on desks. Students eliminate distracters first, then select the best answer and explain why it works and why another option doesn’t.
2. Multi-Select. Select all that apply and prove it: Students select all correct options and justify each choice. They also identify one tempting option that doesn’t hold up under scrutiny.
3. Drag-and-Drop. Sort and sequence: Using Post-it Notes, students sort ideas, steps, claims, or evidence into categories or sequences drawn on desks. Groups discuss and revise placements as they work.
4. Matching. Connect the evidence: Students match terms to definitions, claims to evidence, or causes to effects by drawing lines or arrows, explaining their reasoning for at least one pair.
5. Hot Spot. Mark the proof: Students circle or underline the most important part of a text, chart, or image and explain why it matters more than other plausible options.
Across every station, students are thus choosing, sorting, revising, and explaining.
The Role That Makes the Stations Work
At each station, one group member steps into the role of learning recorder. Before anyone checks answers, every student records their own initial thinking. Once that’s done, the group has a discussion, and then the learning recorder
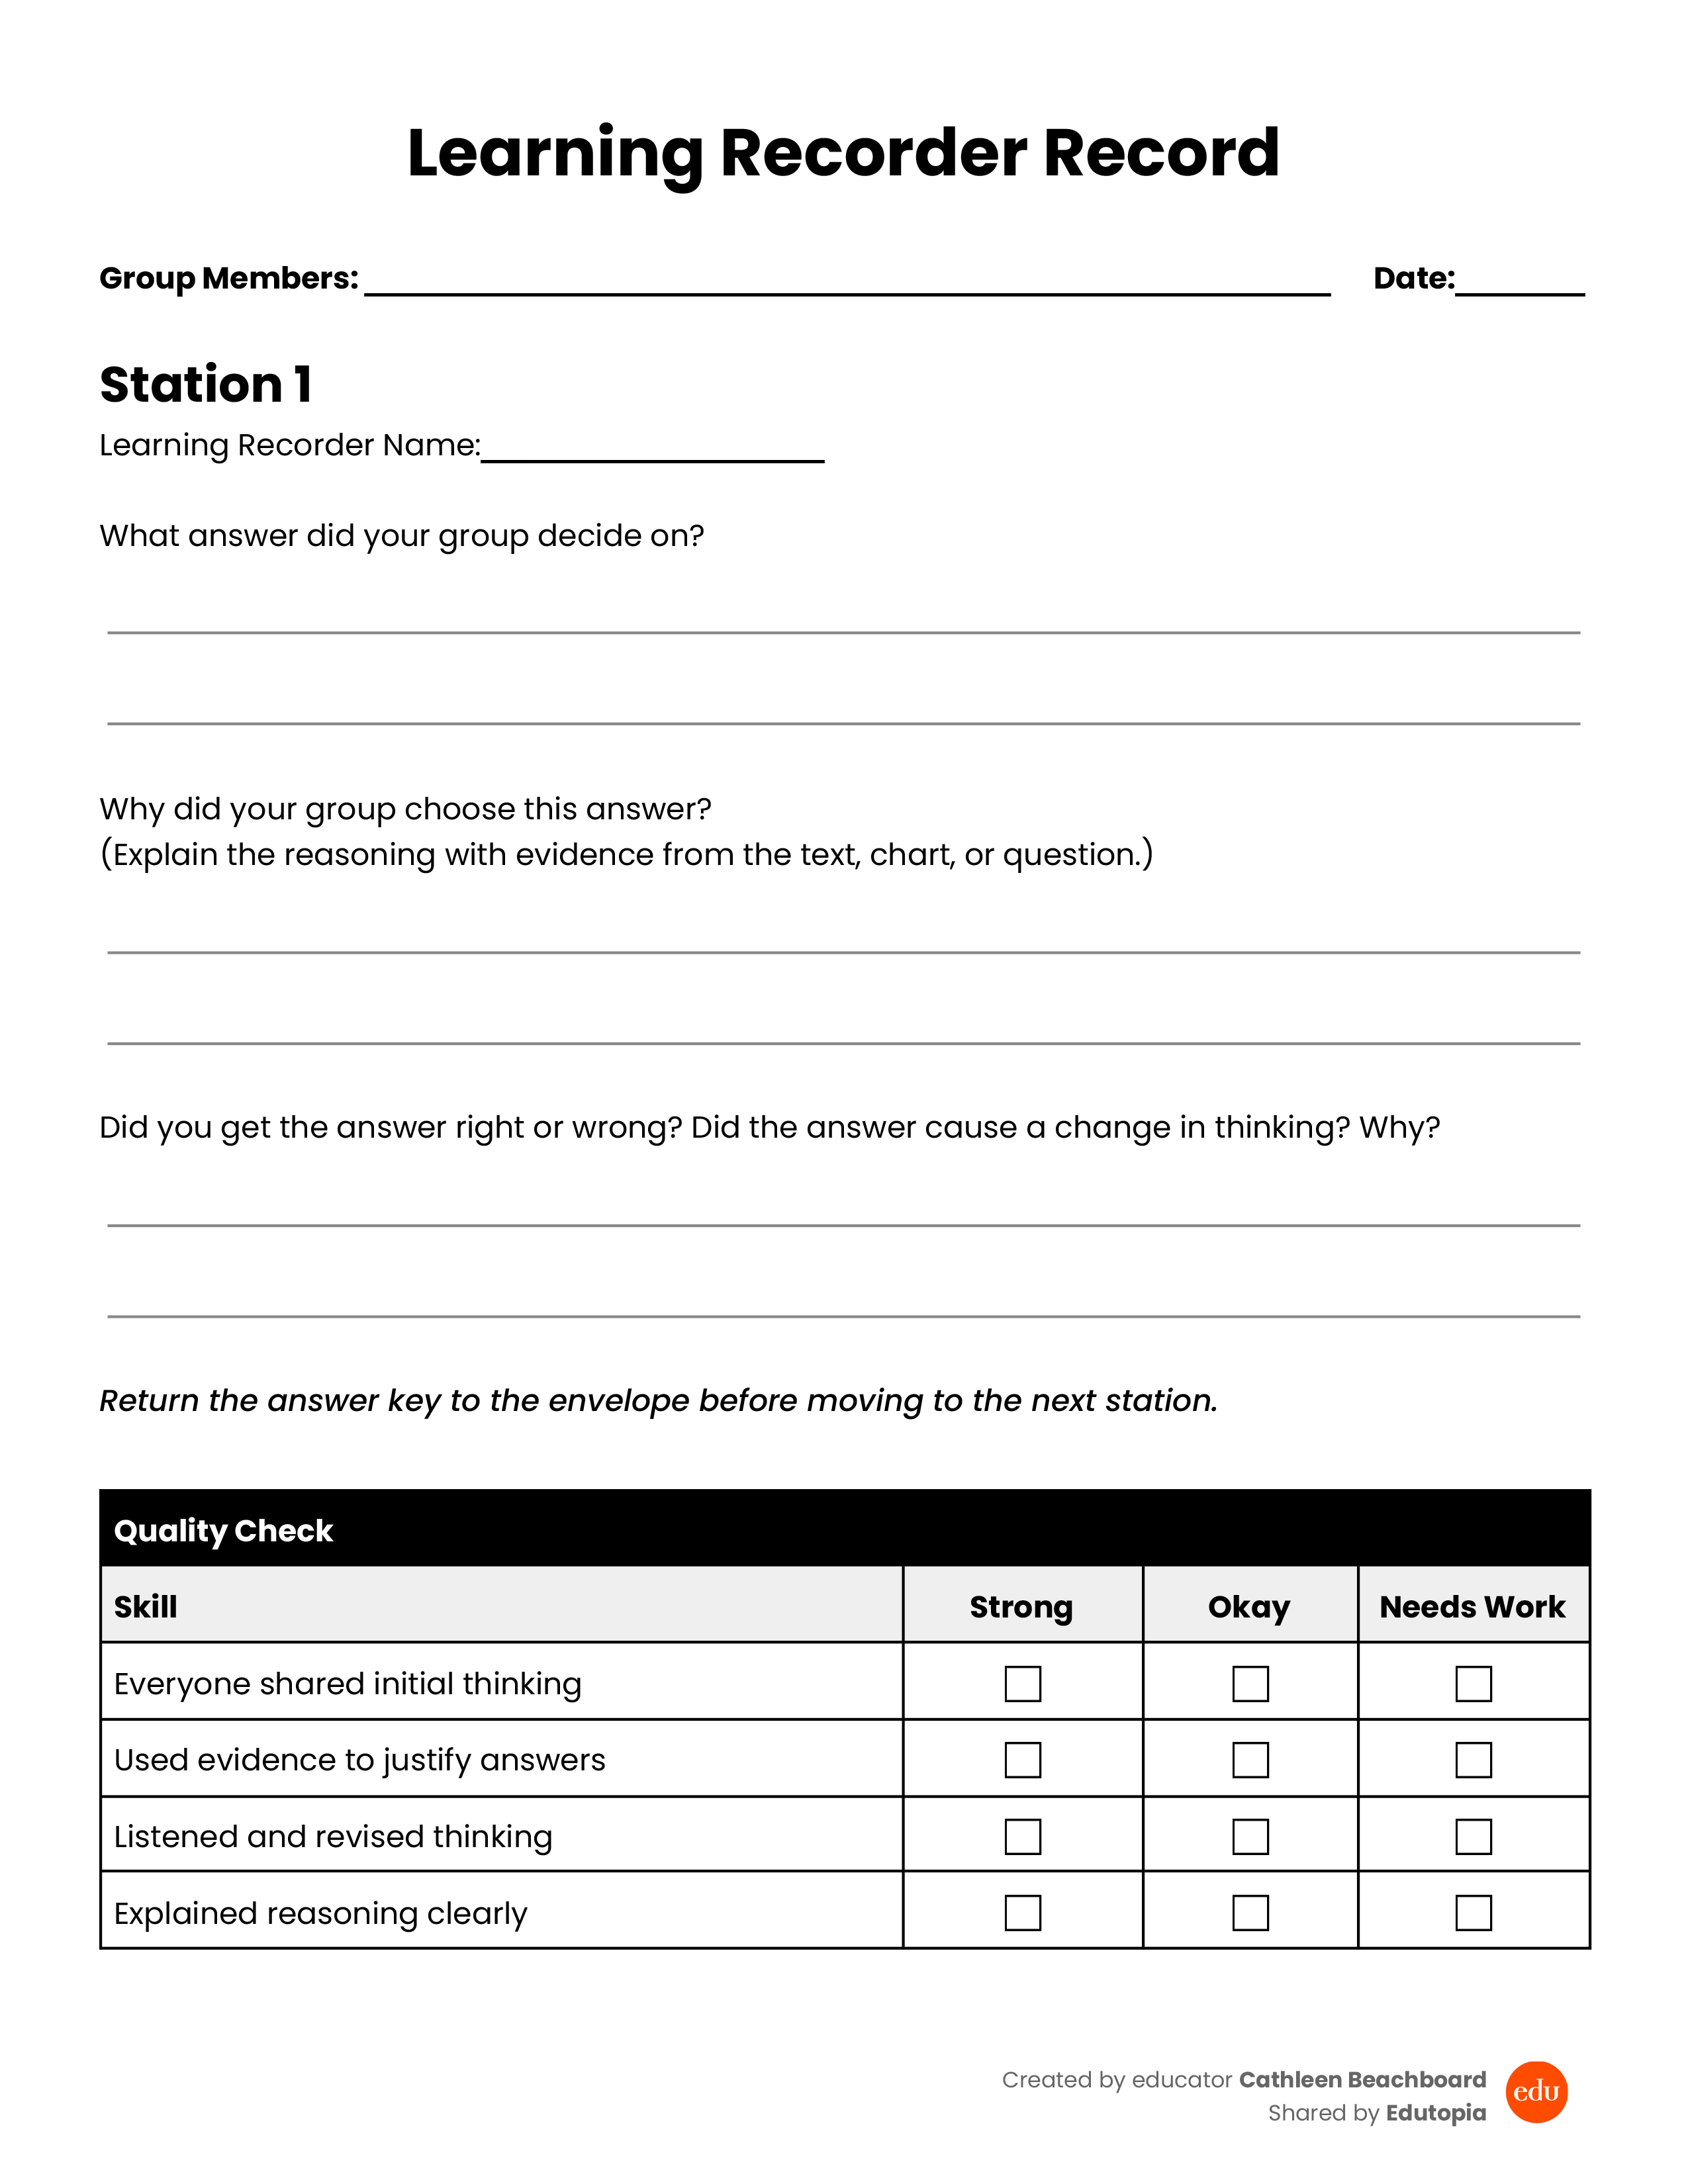
- documents the group’s initial reasoning on the answer they chose together using this group record sheet,
- opens the envelope to check the answer key, and
- records what changed and why.
After each rotation, a new student takes on the role. The answer key stays with the station.
Because the learning recorder captures other students’ thinking, the role does more than just document the group‘s answers—it actively builds cognition. As the recorder listens, summarizes, and translates others’ ideas, they begin to form new pathways of thought and strengthen their reasoning skills.
The process requires them to synthesize what they hear, compare perspectives, and construct a clear explanation of the group’s thinking. Over time, this repeated act of listening, processing, and articulating deepens understanding and helps students learn how to think, not just what to answer.
How Student Thinking Drives What Comes Next
Those written responses are my most valuable instructional data. I can see, in detail, where thinking breaks down—not just which answer is wrong, but why. Patterns emerge quickly, like if certain standards paired with certain question types create consistent confusion. That allows me to respond immediately.
The individual and group record sheets show me where reasoning breaks down, not just which answers are wrong. When I review them, I look for patterns across stations, such as weak use of evidence, confusion about question structure, or misunderstandings tied to specific standards. Those patterns guide my next instructional moves.
Instead of broad reviews, I plan targeted small group support and follow-up practice based on real student thinking. I pull students who show similar roadblocks and walk with them from station to station, asking guiding questions and modeling how to think through the tasks.
Because the data comes directly from student explanations, my support is precise. Students who need more help get it, without stigma, and before misconceptions became habits.
Why This Works
Students don’t need to practice the test—they need time to practice the thinking the test requires.
By spreading test prep across weeks, anchoring it in conversations, and guaranteeing credit for thinking rather than correctness, I can guide students to engage more deeply. The assessment no longer feels intimidating because the thinking feels familiar. My most effective test prep isn’t about doing more. It’s about knowing what matters most and giving students the time, space, and support to think it through together.